creating Title Blocks and projected views
Open up a new drawing -

It defaults to the wrong sized sheet - right click on "sheet 1", edit, and choose size A paper:

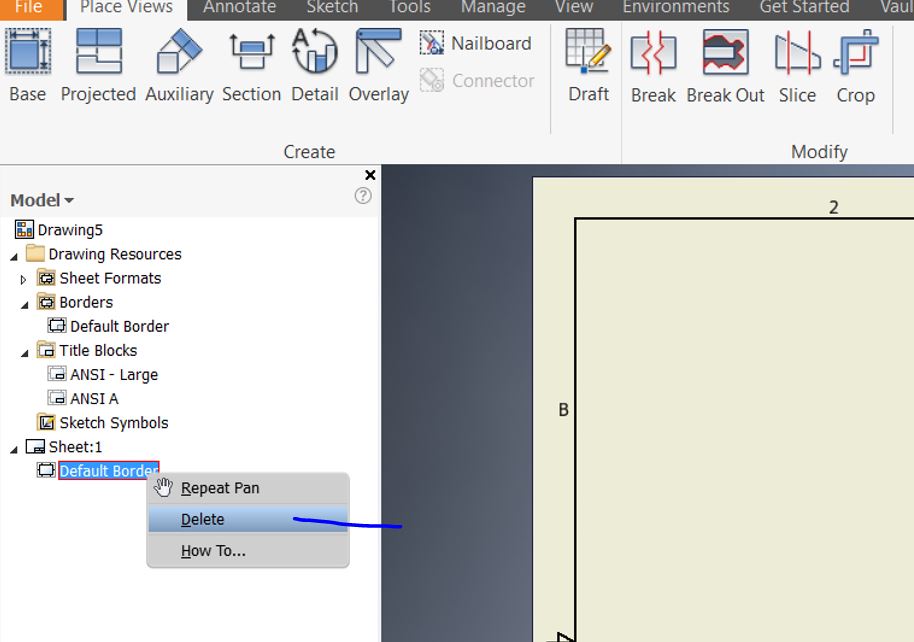
Delete the default border and title block - right click, and delete

Drawing Resources→Define New Zone Border→


This will take you into a sketch mode where you can further modify your borders if you want - go ahead and just finish the sketch:

Give your custom border a name:


Your custom border should now be on your sheet:

Now to create a Title block:
right click→define new title block

Draw some rectangles just like we did in AutoCAD

Fill in text, insert your company logo:

New feature in Inventor - Auto-filled Title blocks!
Look through the Property menu to see all of the different things you can add.

Auto fill in the scale:

Create your own entries:


Once you are done creating your custom Title Block, Finish the Sketch:

Save your TitleBlock:

Right click on the Title Block you created under drawing resources, and insert it into your sheet:

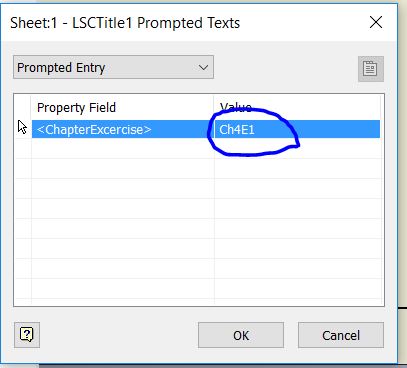
It will ask you to fill in any prompted entries you created:
You can also go back later to fill data in - just right click on anything you want to change!

Fill in the "iproperties" for your file. i properties help you organize your work, and can all be linked to your Title Block

explore all of the properties you can assign to your work:


Projected Views:

Auxiliary views:

Try out some of the dimension features.
